Getting started
The Bim3Lab Suite bundles seven production and design tools for Revit into one installer, with a shared ribbon tab and a single licence. While your subscription is active you also receive every new Suite tool at no extra cost. Mr Plotter is a separate product with its own licence.
Installing
- 01Sign in at bim3lab.com, open your account, and click Download to get the installer.
- 02Unzip it, run Bim3Lab.RevitSuite.Setup.exe, and tick the Revit versions you want (only the ones you have are shown).
- 03Start Revit. The first time, Revit asks whether to load the add-in — click Always Load.
Before you activate, only the About Bim3Lab button appears — the tools stay hidden until you enter a serial.
Activating your licence
- 01On the ribbon, open the Bim3Lab tab and click About.
- 02Go to the Licence tab, enter your serial (the B3L-… code) and the account email.
- 03Click Activate this computer, then restart Revit once.
- 04After the restart, the tools your licence covers appear on the Bim3Lab tab.
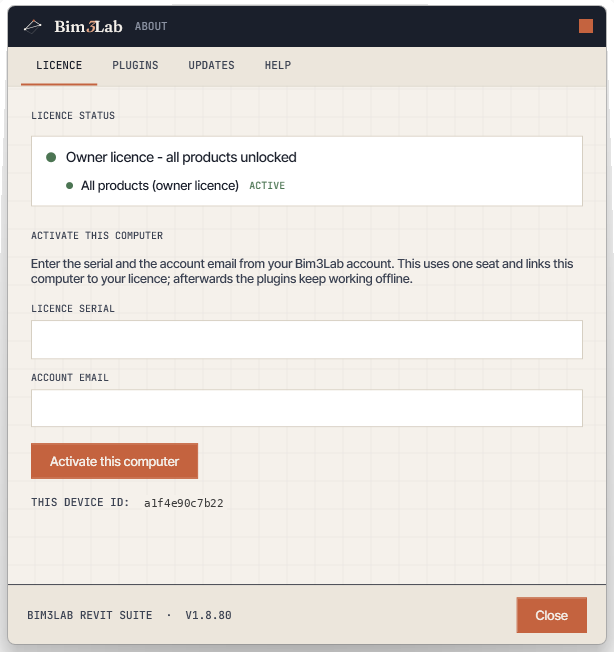
Your company has one serial covering everyone. Each activation uses one seat = one computer; activate online once, then it runs offline for the licence year. Moving PC? Deactivate the old computer in your account to free its seat.
Licences & seats
Bim3Lab licences are managed per organisation. Your organisation has a single company serial that covers every product you subscribe to — there is only ever one serial to distribute, no matter how many products or seats you hold.
Each subscription is measured in seats: one seat activates the software on one device. A team member activates by entering the company serial and their email in the plugin, which unlocks every product the organisation is entitled to that still has a free seat, and then runs offline for the licence period.
Additional products or seats — purchased at the same time or later — are added to the same serial automatically, as long as they are bought from the same account. Users who are already activated simply reopen About → Licence and re-activate to pick up newly added products. The account owner can free a seat at any time from the account dashboard — for example when a colleague changes computer or leaves — and it becomes immediately available to another device.
The Bim3Lab ribbon
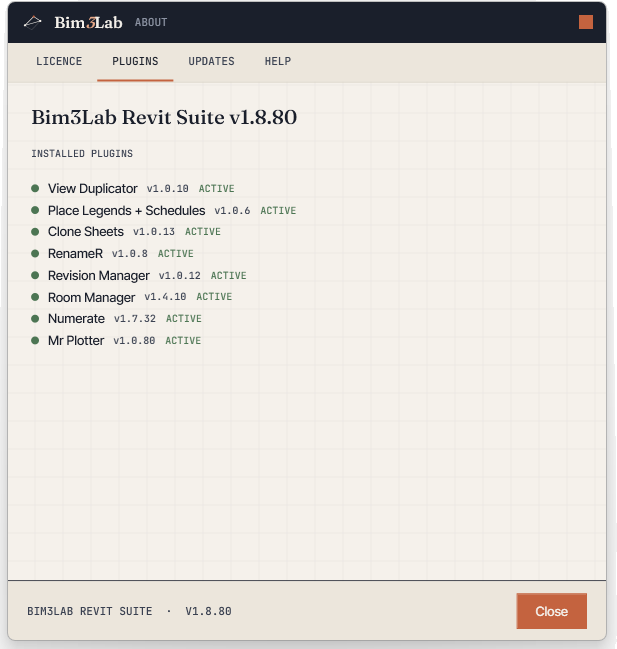
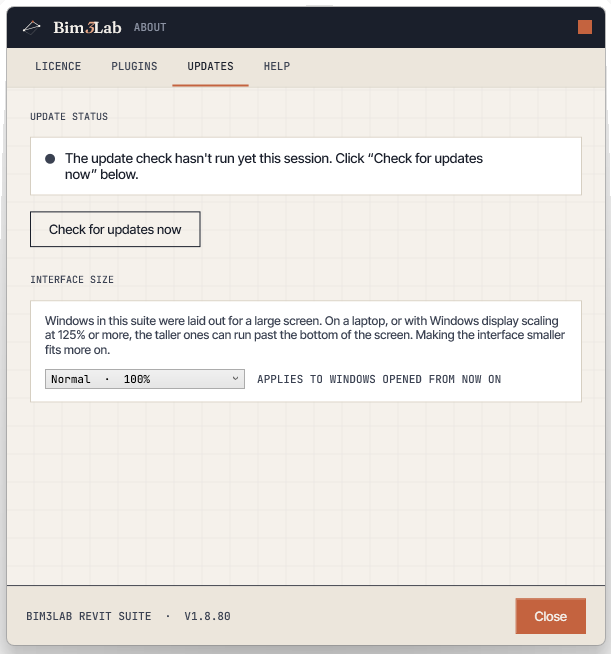
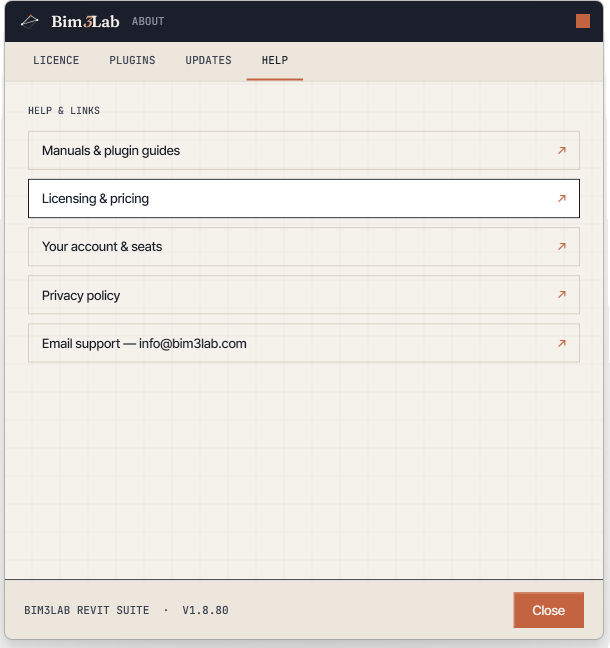
After activation a Bim3Lab tab appears with your tools grouped into panels. About is always first — it’s where you check your licence, look for updates, set the interface size, and find help.


View Duplicator
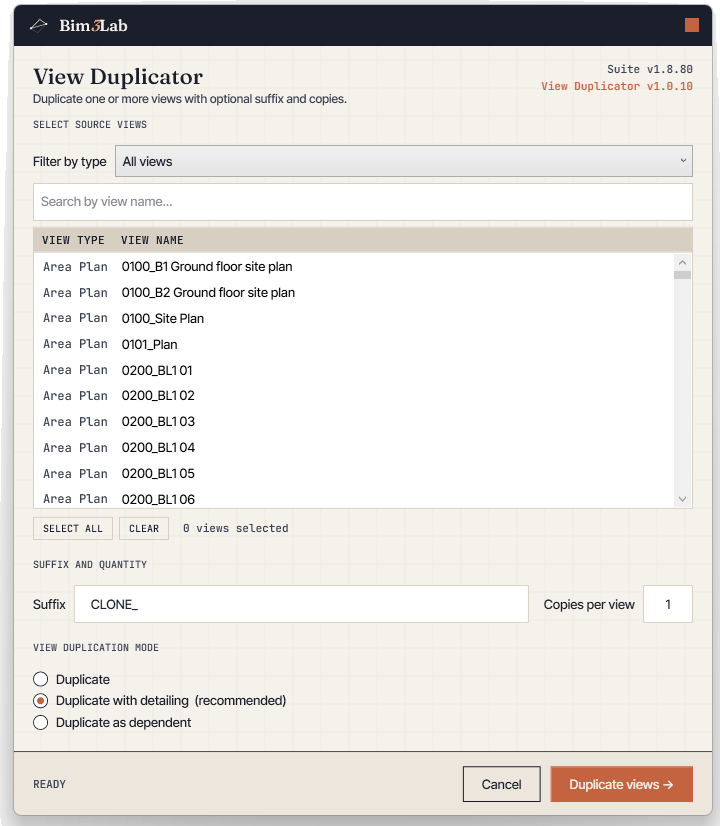
Batch-duplicate views with suffix patterns and type filtering.
Select any number of source views, choose a duplication mode and a suffix template, and View Duplicator creates the whole set at once — consistent names, no missed views, no drift between drawing series.
Where to find it: Bim3Lab tab → View Duplicator
How to use
- 01Open View Duplicator.
- 02Pick the source views. Optionally filter the list by Plan, Section or All.
- 03Choose a duplication mode and how many copies to make per view.
- 04Set the suffix template — new names follow [original]_[suffix][n].
- 05Run — the whole set is generated in one pass.
Tips
- + Multi-select as many source views as you like.
- + Three duplication modes.
- + View-type filtering keeps long lists manageable.
Press play to load the video from YouTube. Nothing is requested from YouTube until you do.
Place Legends + Schedules
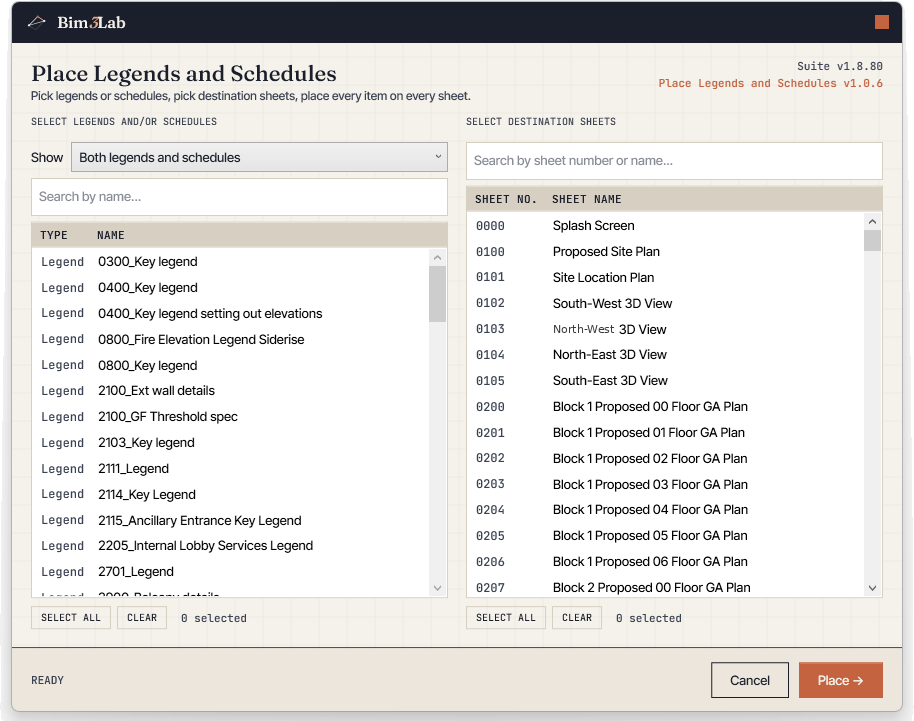
Place legends and schedules on many sheets at once, consistently positioned.
Pick legends or schedules, pick the target sheets, and the tool stamps every selected item onto every selected sheet with identical coordinates — the end of nudging the same legend into place on forty sheets.
Where to find it: Bim3Lab tab → Place L & S
How to use
- 01Open Place L & S.
- 02Pick the legends or schedules to place.
- 03Pick the destination sheets.
- 04Run. Position is taken from the item’s first existing placement, or centred on the sheet if it isn’t placed anywhere yet.
Tips
- + Existing placements are left alone — no duplicates.
- + Works for both legends and schedules.
Press play to load the video from YouTube. Nothing is requested from YouTube until you do.
Clone Sheets
Duplicate sheets and every view placed on them, in one operation.
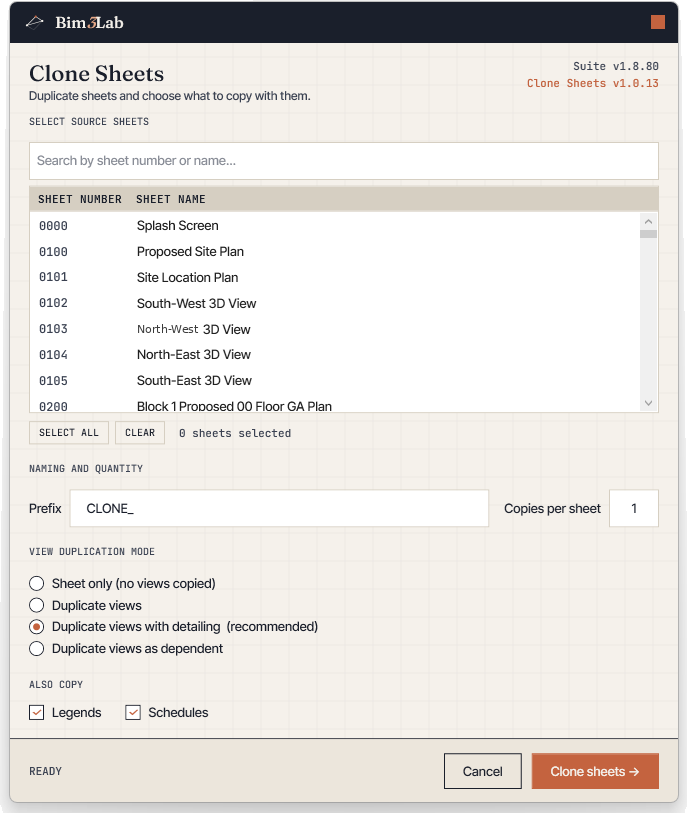
Clone Sheets duplicates whole sheets including the views placed on them, with control over target levels, the view-duplication mode, and naming patterns. What used to be twenty minutes of manual duplication becomes one dialog.
Where to find it: Bim3Lab tab → Clone Sheets
How to use
- 01Open Clone Sheets.
- 02Select the sheets to clone and choose how many copies to make.
- 03Decide whether the views on the source sheet are duplicated too, and pick the mode (duplicate / with detailing / dependent).
- 04Run. New sheet numbers come from your prefix plus a numeric suffix.
Tips
- + Views can be placed across levels.
- + Naming patterns are configurable.
Press play to load the video from YouTube. Nothing is requested from YouTube until you do.
RenameR
Build a renaming rule, or a chain of them, for views, sheets and family types — with a full preview.
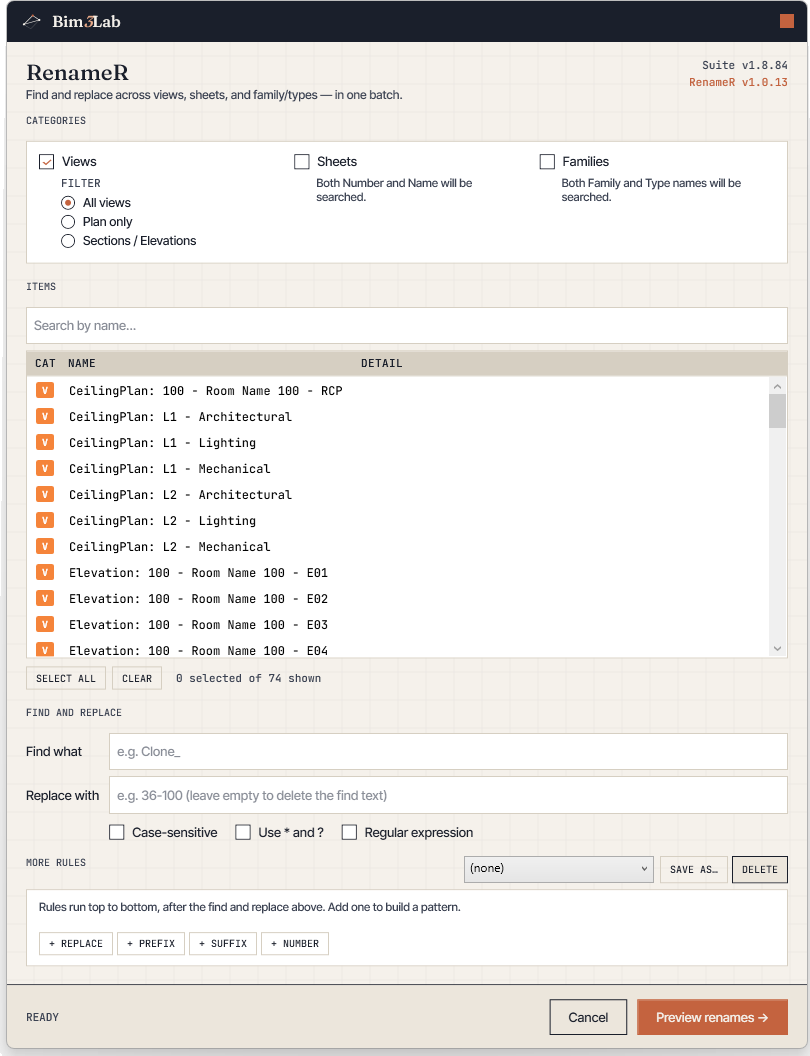
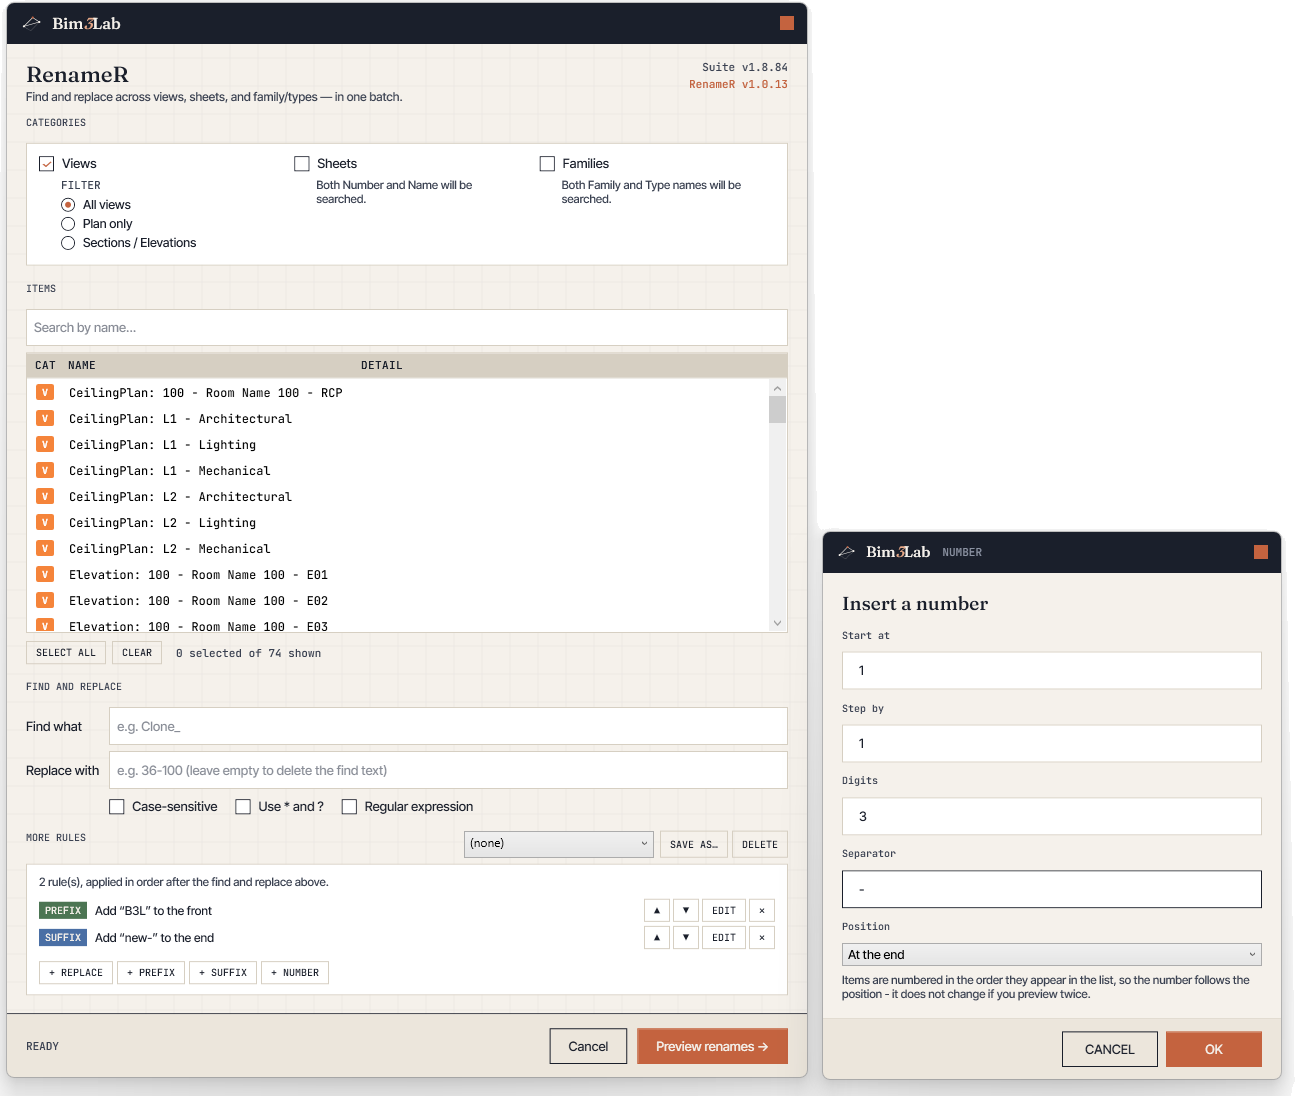
RenameR runs an ordered list of rules — find and replace, add a prefix or a suffix, insert a running number — across view names, sheet names, family names and family type names in one pass, with a full preview before anything is committed. Naming-convention cleanups that took an afternoon take a minute.
Where to find it: Bim3Lab tab → RenameR
How to use
- 01Open RenameR.
- 02Pick the categories to rename — any combination of Views, Sheets and Families.
- 03With Families ticked you get two kinds of row: a green F renames the family itself, a teal T renames one type inside it. The NAME column always shows what that row will change. Pick both if you want both renamed.
- 04Pick the items, then type a Find string and a Replace string. Tick Case-sensitive if the difference matters, or Use * and ? for wildcards.
- 05For anything more than one replacement, add rules under MORE RULES: REPLACE, PREFIX, SUFFIX or NUMBER. They run top to bottom, and the ▲▼ buttons change that order.
- 06Check the preview of the new names.
- 07Apply. Items nothing changed are skipped; name collisions are flagged and skipped.
Tips
- + Always preview before committing — nothing changes until you apply.
- + Rules run in order, so a NUMBER rule placed after a PREFIX rule numbers the already-prefixed name. Reorder with ▲▼ if the result is not what you expected.
- + Numbers follow the order of the list, not how many times you preview — previewing twice never shifts them.
- + SAVE AS… stores a rule set inside the project, so everyone opening the model gets it. A copy is kept on your PC as a backup.
Press play to load the video from YouTube. Nothing is requested from YouTube until you do.
Revision Manager
Add, remove and manage revisions across many sheets at once.
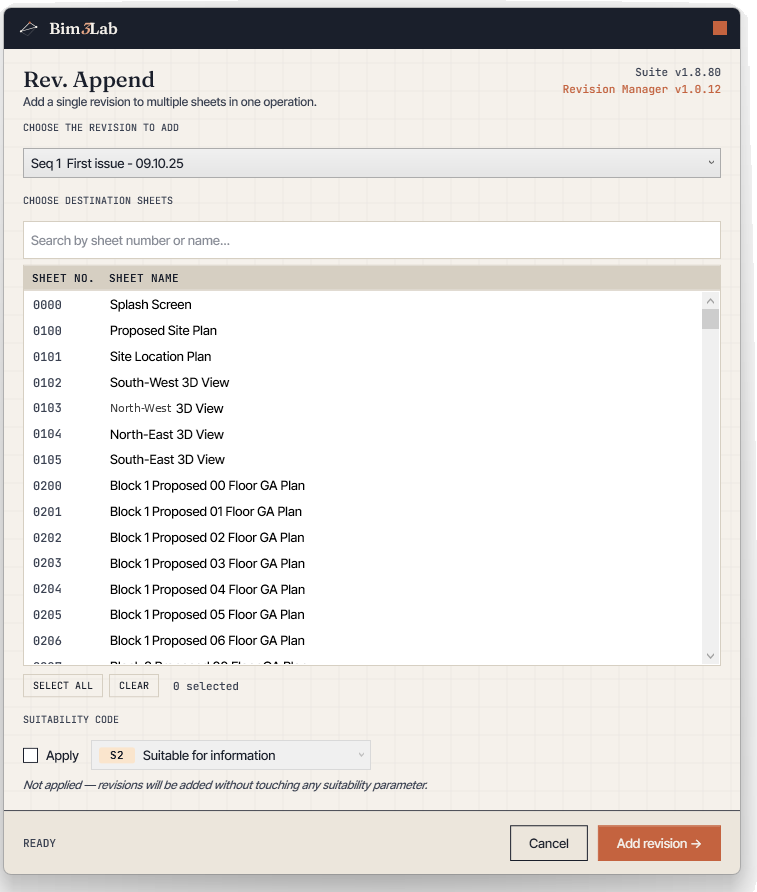
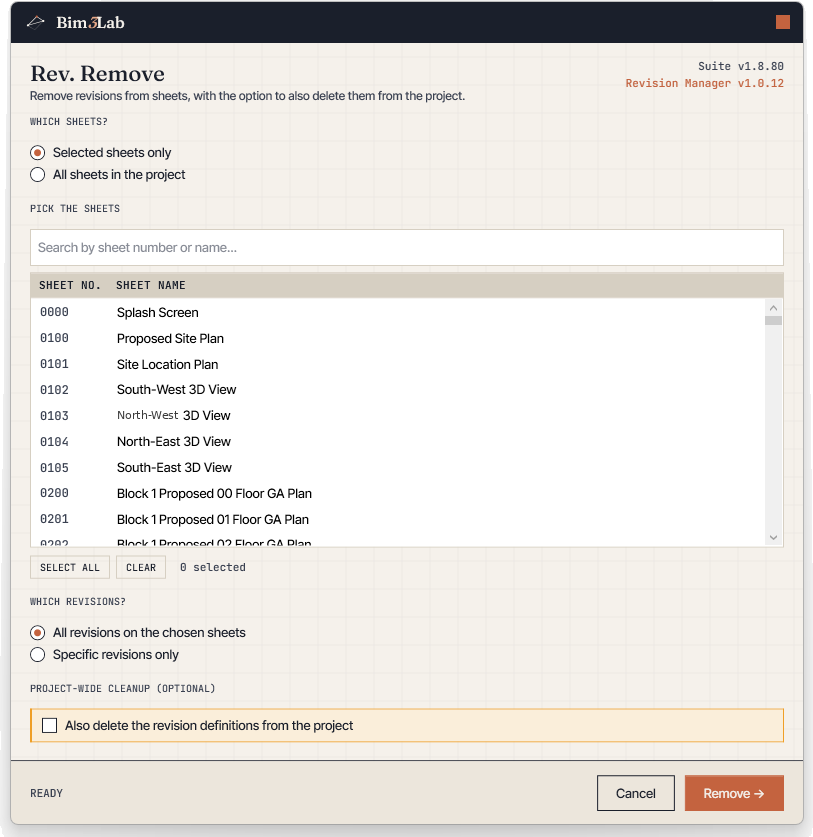
Revision Manager applies, removes and reorders revisions across whole sheet sets — no more stepping through the revisions dialog sheet by sheet. Click the button to open the menu and pick Append or Remove.
Where to find it: Bim3Lab tab → Rev. Manager (Append / Remove)
How to use
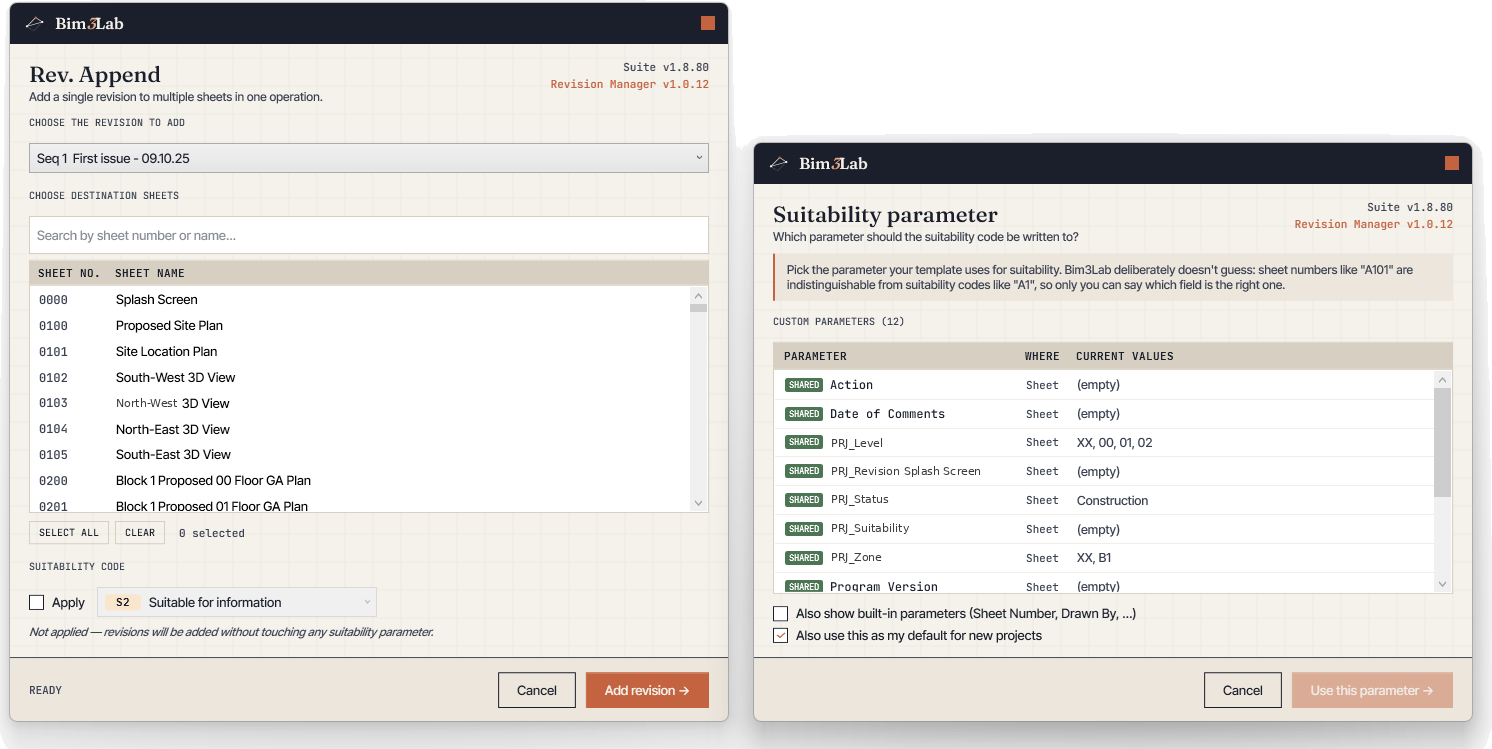
- 01Append — pick one revision, pick the destination sheets, and it adds that revision to every selected sheet. Sheets that already have it are skipped.
- 02Remove — pick which sheets to clean (or all), then remove all revisions or specific ones. Optionally also delete the revision definitions from the project. A confirmation summarises the impact first.
Tips
- + Works across the whole sheet set in one go.
- + A configurable suitability parameter keeps sequencing consistent.
Press play to load the video from YouTube. Nothing is requested from YouTube until you do.
Room Manager
A complete documentation set per room — plan, RCP, elevations, 3D and schedules, laid out on its own sheet.
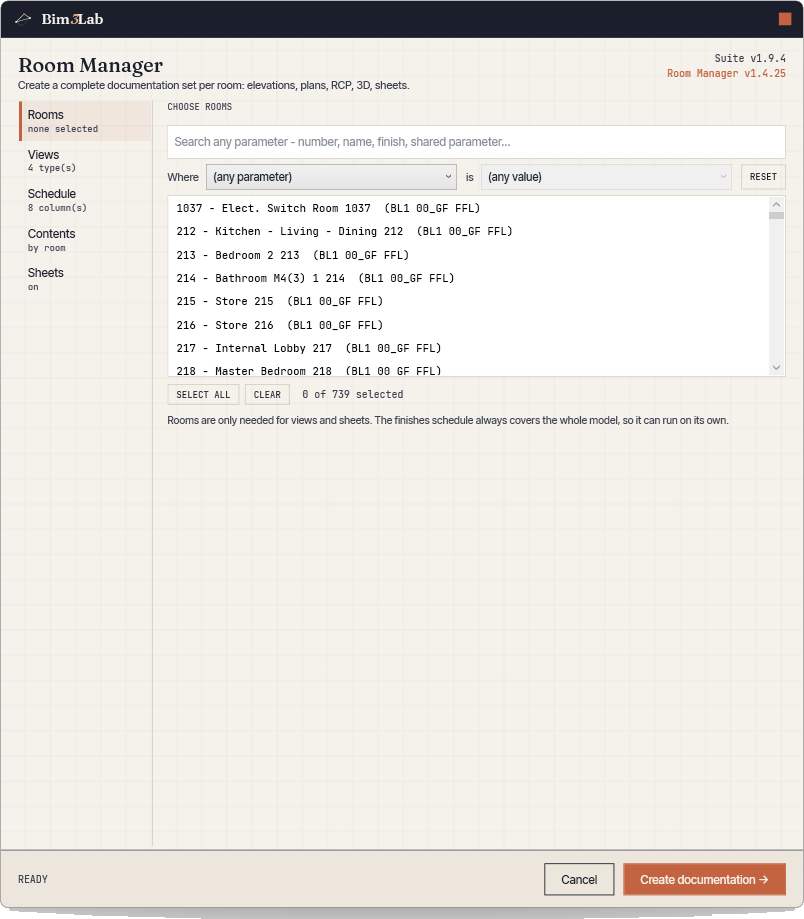
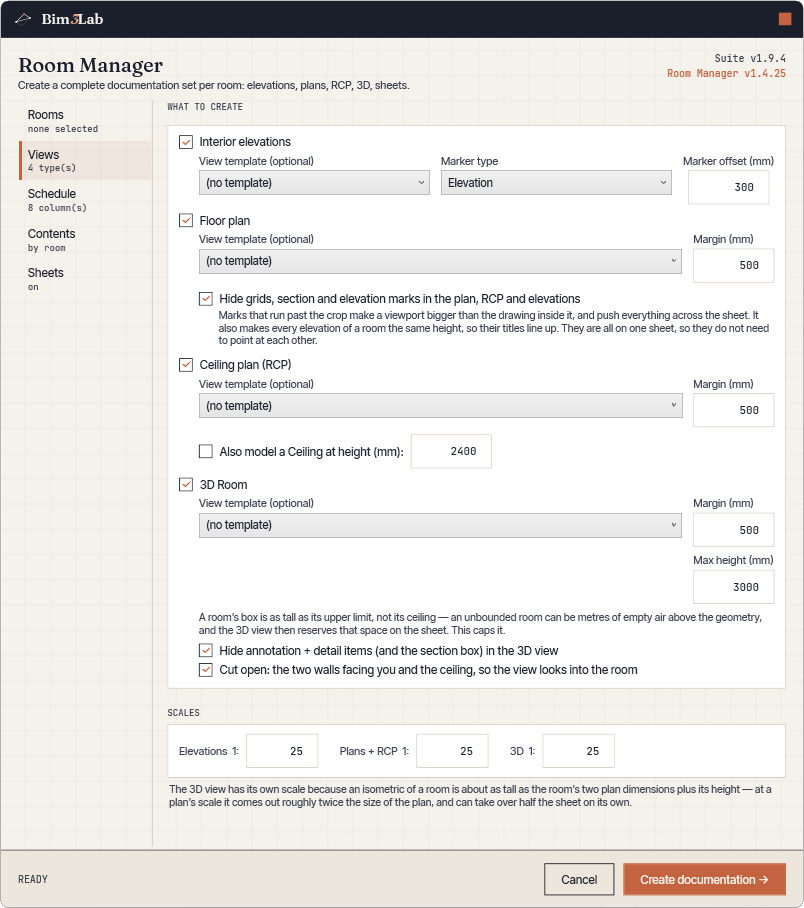
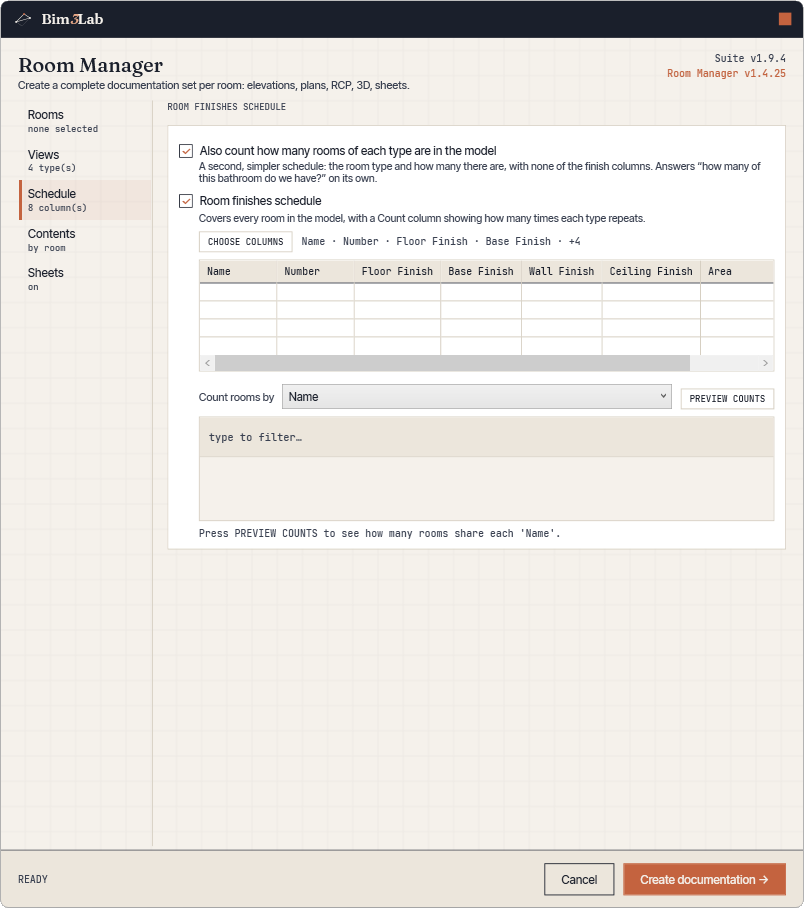
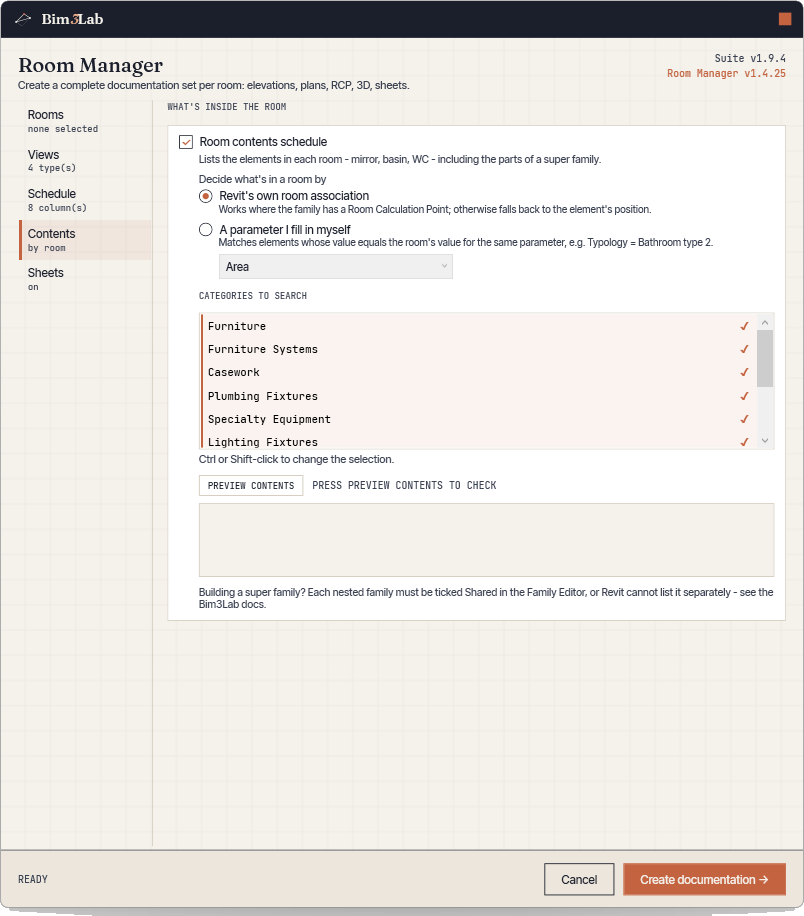
Pick a room and Room Manager produces the whole set: interior elevations, a floor plan, a ceiling plan and a 3D view that opens into the room with the two near walls and the ceiling left out, so you can see the fittings. It schedules what is actually in the room — mirror, basin, WC, and the parts of a super family — found either from Revit’s own room association or from a parameter you fill in yourself, and counts how many rooms of each type the model holds, by any parameter you choose. Then it lays everything out on a sheet, moving up to a bigger title block if the views do not fit. It handles irregular geometry, linked-model walls, rotated true north and room-tag centring automatically.
Where to find it: Bim3Lab tab → Room Manager (with a Re-centre Tags companion)
How to use
- 01Open Room Manager and search the rooms by any parameter, then pick the ones to document.
- 02Views: choose elevations, floor plan, ceiling plan and 3D, each with its own template, margin and scale.
- 03Schedule: pick the finishes columns, and add a count of how many rooms of each type the model holds.
- 04Contents: schedule what is inside each room, found by Revit’s room association or by a parameter you fill in.
- 05Sheets: one sheet per room, fitted to the content — a bigger title block if the views do not fit.
- 06Run. The whole run happens in one transaction, so a single Ctrl+Z reverts it.
Tips
- + Re-centre Tags moves every room tag back onto its room’s centre — handy after tags drift.
- + The finishes schedule covers the whole model on its own — rooms only need selecting for views and sheets.
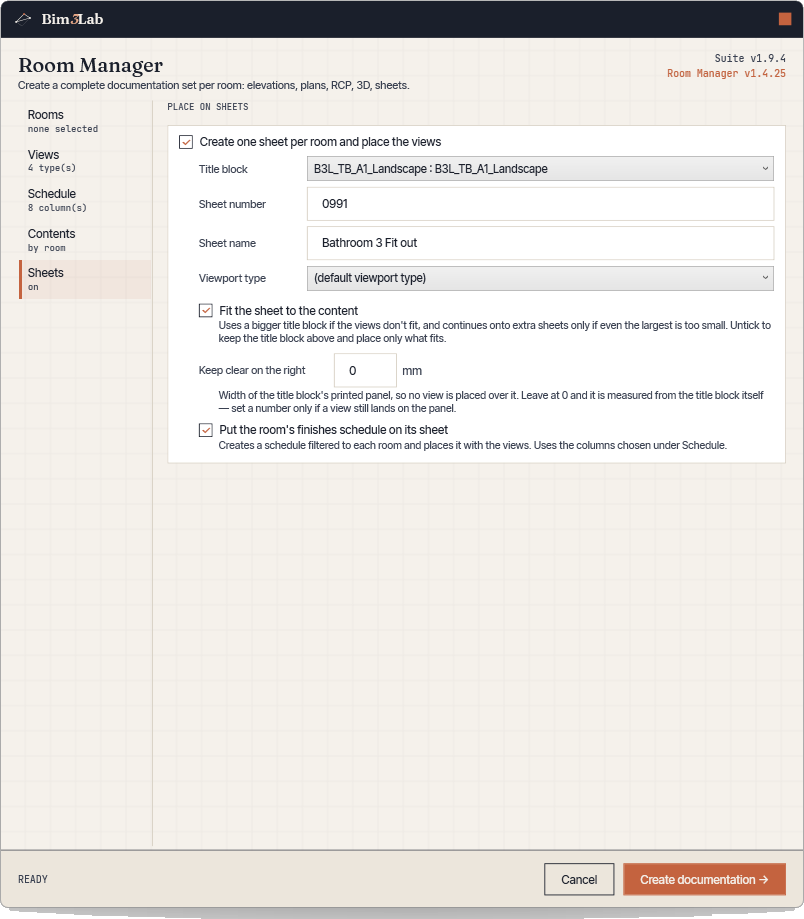
Press play to load the video from YouTube. Nothing is requested from YouTube until you do.
Numerate
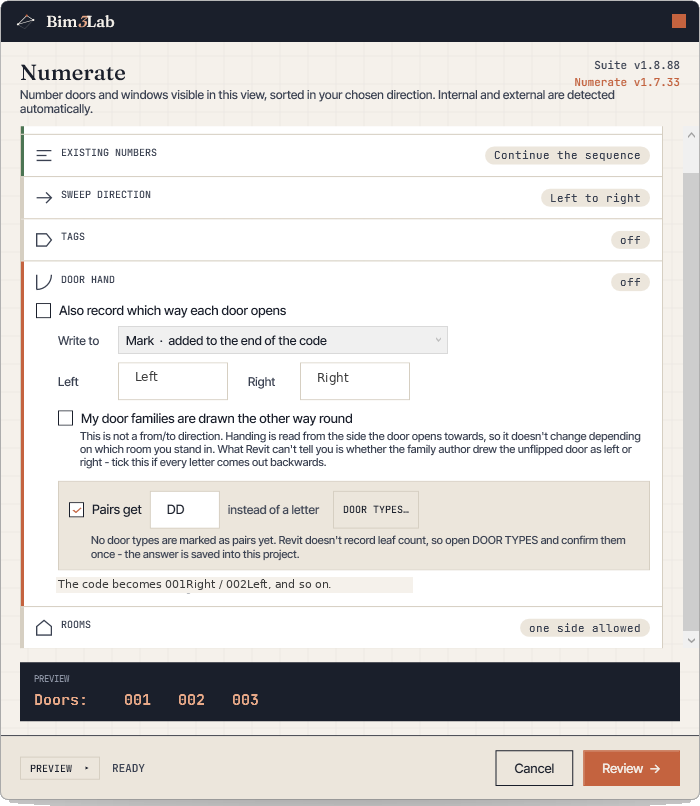
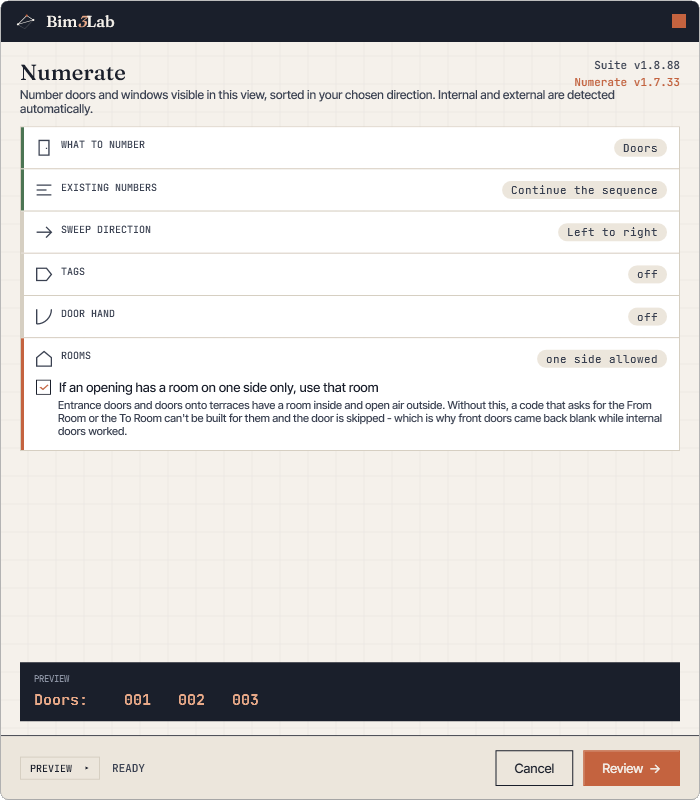
Numbering and door hand for doors, windows and curtain panels — reviewed before anything is written.
Numerate reads the doors, windows and curtain panels visible in the current view, classifies each opening as internal or external, sorts them in the sweep direction you choose, and writes a code you have built yourself: your own text, a parameter read from the opening or from its level, the room either side or the area it stands in, an internal/external code, a number, a letter. It works in any view orientation, including rotated true north.
Where to find it: Bim3Lab tab → Numerate, with Door hand and Tagger alongside it
How to use
- 01Open the view you want to number and run Numerate.
- 02Press Set up for each category to build its code from the parts you want, then save it as a preset — presets travel with the project, so the whole team gets your convention.
- 03Choose the sweep direction, and whether to continue the existing sequence or restart it.
- 04Press Review. Nothing is written yet — you get every code it would produce, grouped by the flat or room each opening belongs to, and you can mark any opening “don’t change”.
- 05Press Number them. Openings already numbered to your convention are left untouched and the count carries on from the highest in use.
Tips
- + The review and the run are produced by the same code, so what you see is exactly what happens.
- + Tagger places door and window tags on everything visible afterwards, including elements in linked models.
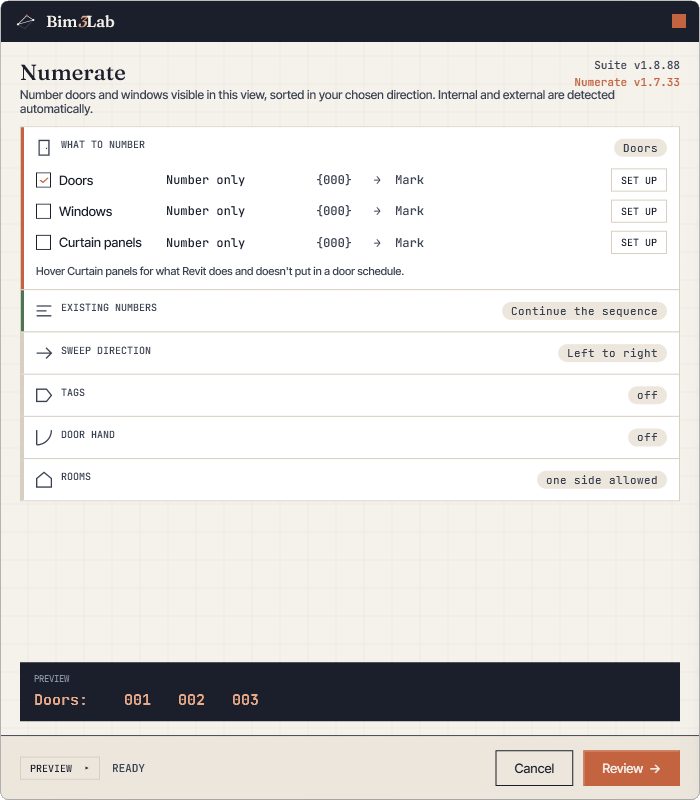
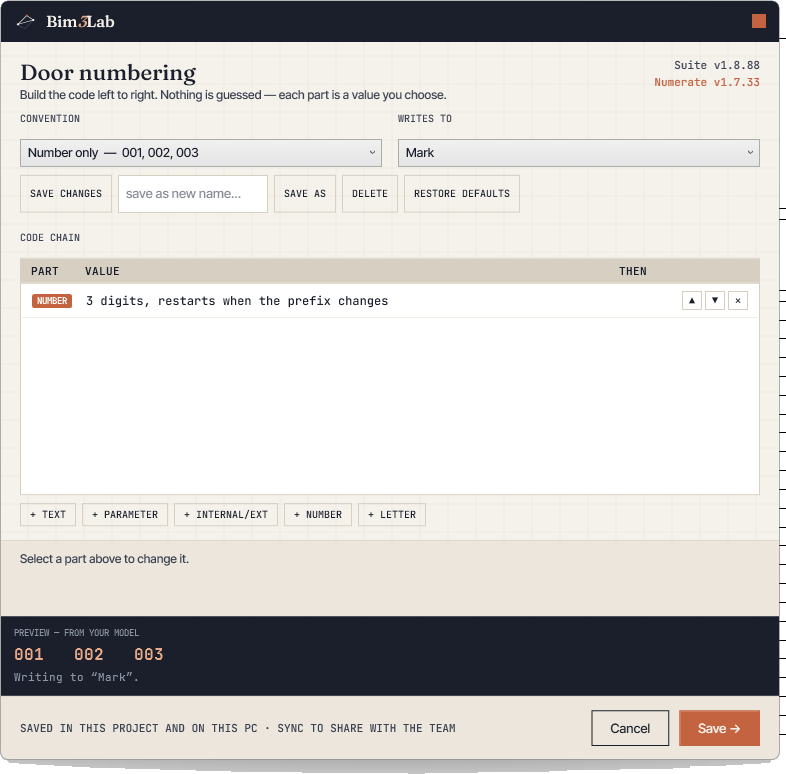
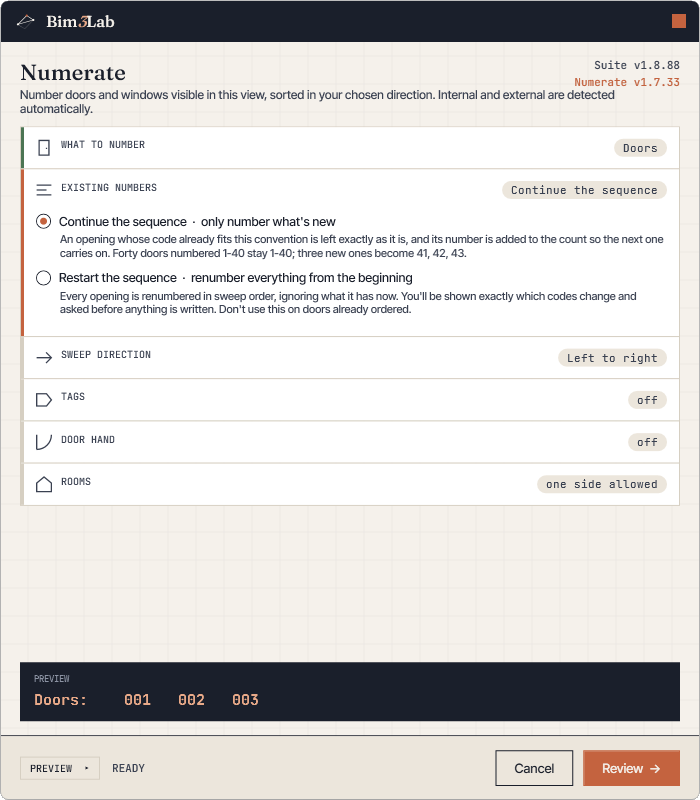
Press play to load the video from YouTube. Nothing is requested from YouTube until you do.
Mr Plotter
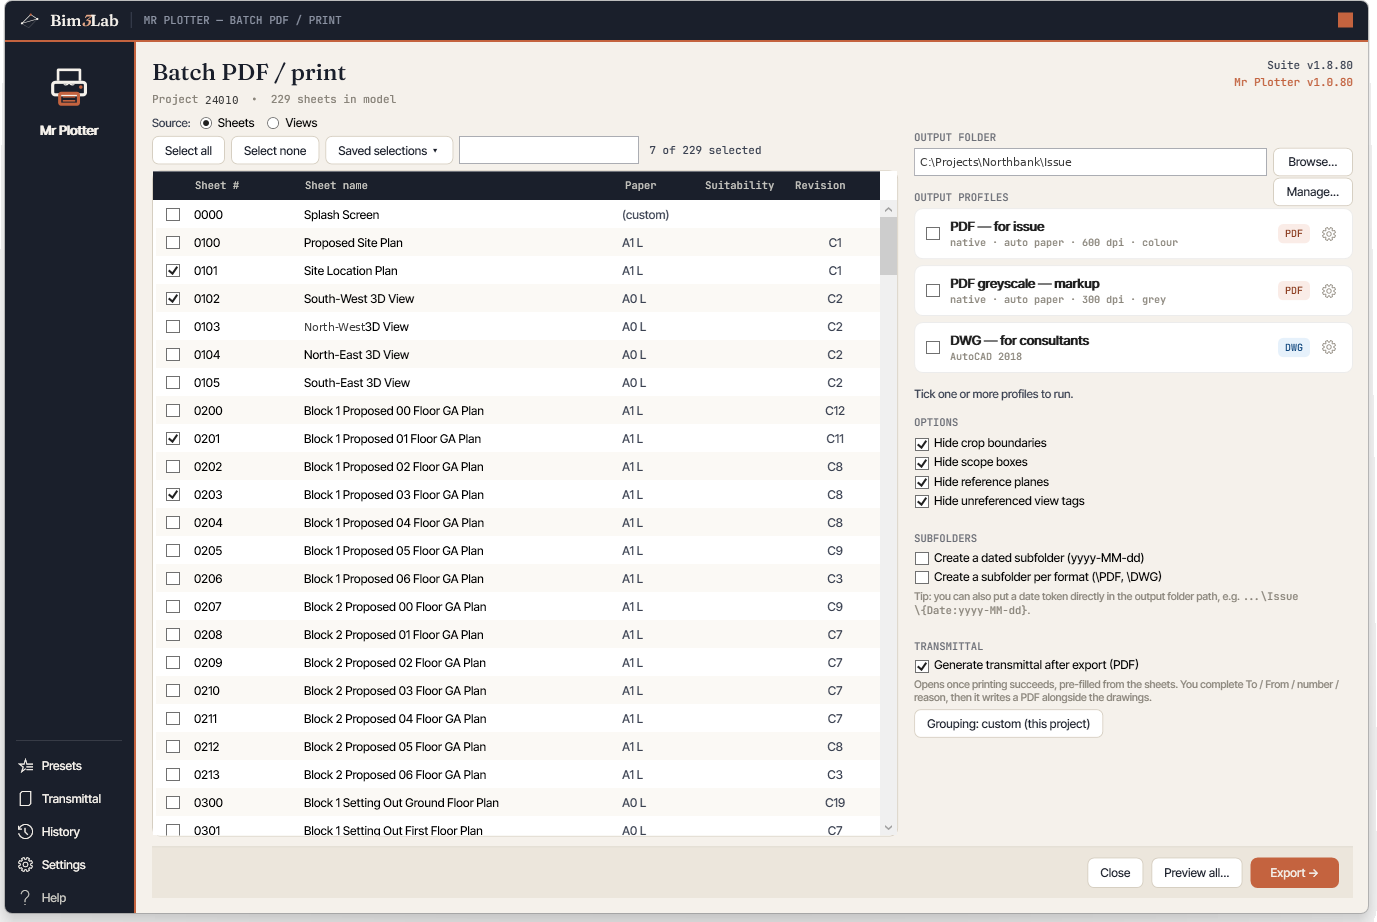
Batch-export sheets to PDF, DWG, DWF or any printer — with live naming, per-sheet QC and ISO 19650 transmittals.
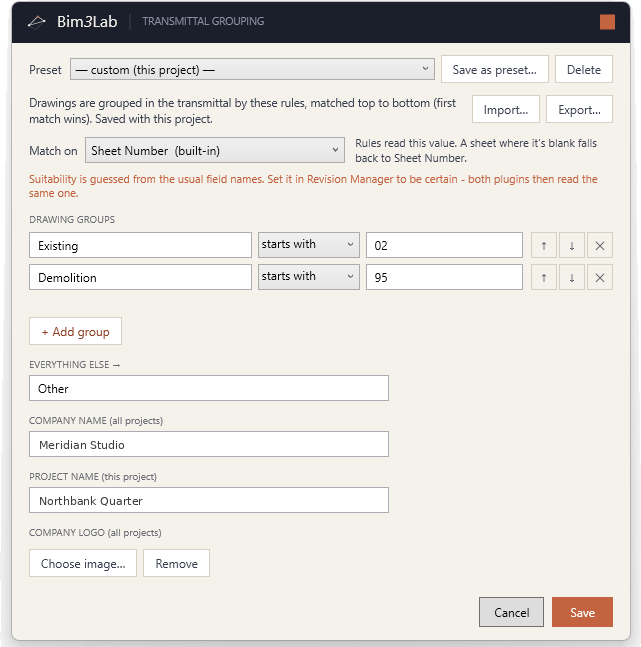
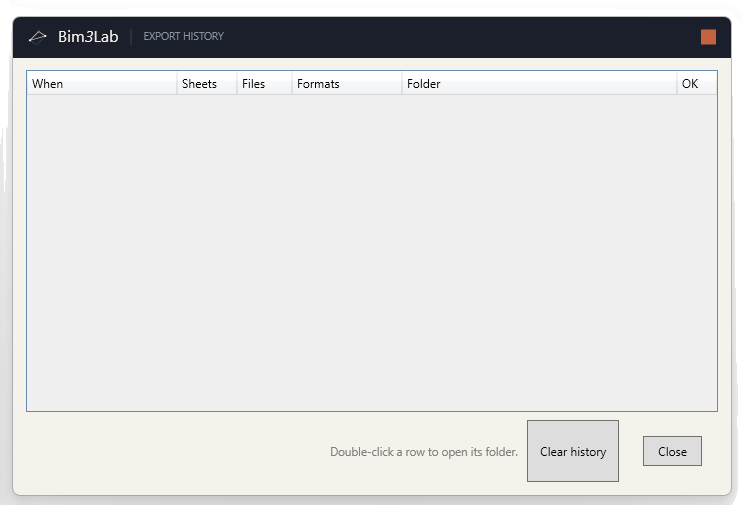
Mr Plotter is a separate product with its own licence. It batch-exports your sheets to PDF, DWG, DWF or any printer driver, with filename presets and a live per-sheet preview, per-sheet quality control before you plot, an ISO 19650 transmittal register carrying your company logo, and a full export history.
Where to find it: Bim3Lab tab → Mr Plotter
How to use
- 01Open Mr Plotter and select the sheets to export.
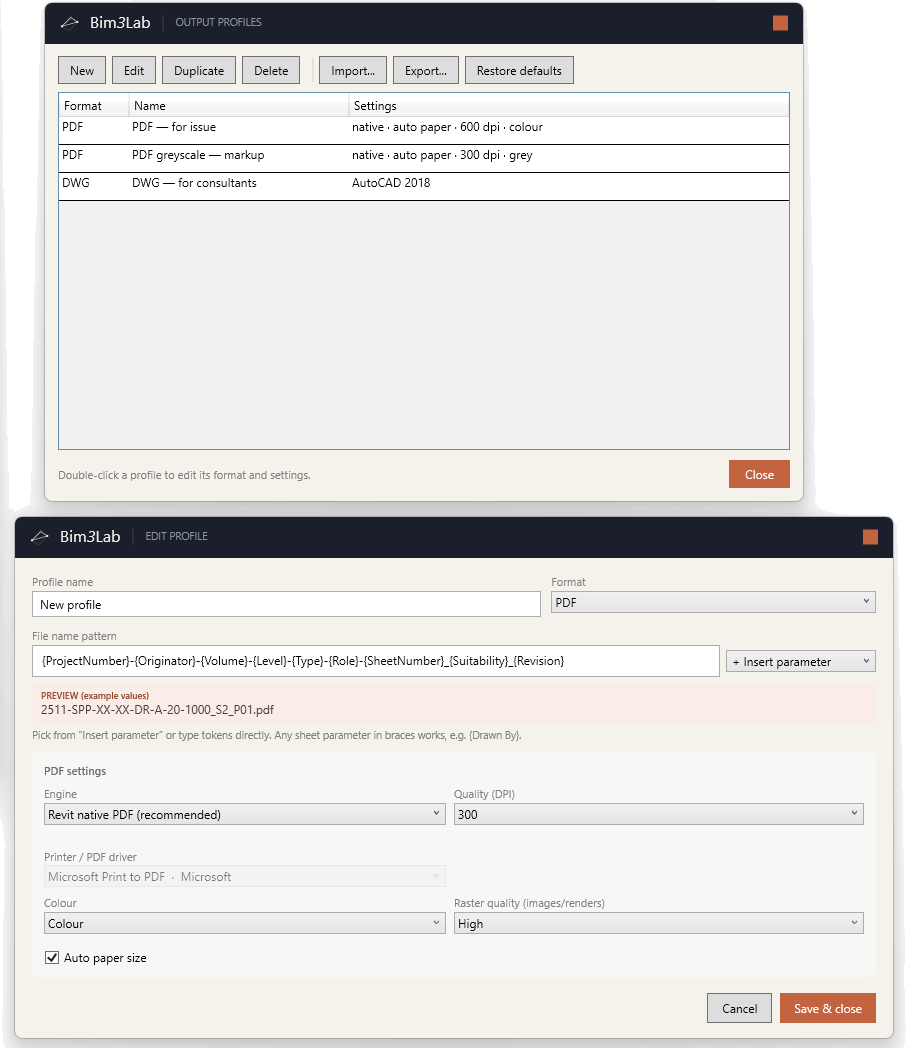
- 02Build a file-naming pattern from the clickable tokens, or pick a saved preset — the exact output name previews live for every sheet.
- 03Choose the format: PDF (native, PDF24-compressed, or any printer driver), DWG (with full layer / unit / coordinate options), DWF, or image.
- 04Run per-sheet quality control to catch problems before you plot, then export.
- 05Optionally generate an ISO 19650 transmittal register (it carries your company logo) and review the export history.
Tips
- + Naming presets are saved per user and reload across projects.
Press play to load the video from YouTube. Nothing is requested from YouTube until you do.
Troubleshooting & FAQ
- I activated, but I don’t see my tools.
- The ribbon is built when Revit starts, so newly-unlocked tools appear after you restart Revit once following activation.
- I only see the About button.
- You haven’t activated yet, or your licence doesn’t cover any installed tool. Open About → Licence and enter your serial and account email.
- Do I need to be online?
- Only once, to activate this computer. After that the tools run offline for the licence year.
- I’m moving to a new computer.
- Each activation uses one seat. In your account, deactivate the old computer to free its seat, then activate the new one.
- Which Revit versions are supported?
- Autodesk Revit 2025 and 2026.
- Where do I find my serial?
- In your Bim3Lab account after purchase, and in your purchase confirmation email.
- How many serials does our organisation need?
- One. A single company serial covers every product and seat your organisation holds. Distribute that one serial to your team — each person enters it in the plugin to activate their device.
- We subscribe to more than one product — is there a serial for each?
- No. Every product your organisation owns is covered by the same company serial. When a user activates, the plugin unlocks all products that still have an available seat in a single step.
- We added a product after our first purchase — do we get a new serial?
- No — as long as it is purchased from the same account, it is added to your existing serial. Users who are already activated just reopen About → Licence and re-activate to pick up the new product.
- How do we reassign a licence when someone leaves?
- The account owner removes that person’s device from the account dashboard, which frees the seat immediately for another team member to activate.
- Do individual team members need a website account?
- No. Only the account owner signs in to manage the subscription and seats. Team members never need a login — they activate directly in the plugin with the company serial.
- The plugin windows are too big for my screen.
- Open About → Updates → Interface size and pick a smaller size — 90% or 80%. It applies to every Bim3Lab window the next time you open one. Windows also size themselves to your screen automatically, so a dialog should not run past the bottom even on a laptop or with Windows display scaling at 125% or more. If one still does, tell us which window and your screen resolution and scaling.
Still stuck? Email info@bim3lab.com — we’re happy to help.